Discover the Joy of Making Old-Fashioned Apple Crisp!
Are you ready to dive into a world of autumnal bliss? Welcome to my fun-filled guide on crafting the perfect **Old-Fashioned Apple Crisp**! This recipe is not just a dish; it’s a delightful experience that combines warm, spiced apples with a crunchy topping that will have everyone begging for seconds. Whether you’re hosting Thanksgiving dinner or just want to treat yourself, this dessert is sure to impress! Let’s get started with everything you need to know about making this scrumptious treat.
Why You’ll Love This Recipe
- Comforting Flavor: The warm spices and sweet apples create a cozy vibe that screams fall, making it the perfect dessert for chilly evenings.
- Easy to Make: With simple ingredients and straightforward steps, you can whip up this delightful dish in no time!
- Customizable Options: Want to add nuts? Prefer a gluten-free version? This recipe allows for plenty of variations to suit your taste!
- Serve It Your Way: Enjoy it warm with a scoop of **vanilla ice cream** or a dollop of whipped cream for the ultimate indulgence.
- Perfect for Sharing: Whether it’s a family gathering or a cozy night in with friends, this apple crisp is a crowd-pleaser that brings people together.
Ingredients Breakdown
Ready to gather your ingredients? Here’s what you’ll need to create this classic apple crisp, along with some handy substitutions!
Essential Ingredients
- 6 large apples: Choose tart varieties like **Granny Smith** or **Honeycrisp** for the best flavor. Need a substitute? Try **Bosc pears** for a different twist!
- 2 tablespoons granulated sugar: This helps sweeten the apples. You can swap with **maple syrup** for a richer flavor.
- 1 teaspoon ground cinnamon: A must-have spice that adds warmth. Feel free to experiment with **pumpkin pie spice** for a fun twist!
- 1/4 teaspoon ground nutmeg (optional): This adds depth; leave it out if you prefer a simpler flavor.
- 1 tablespoon lemon juice: This brightens up the apple flavor and prevents browning. Use **orange juice** if you’re out of lemons!
- 1 cup old-fashioned rolled oats: These give your topping that delicious texture. You can substitute with **gluten-free oats** if needed.
- 3/4 cup all-purpose flour: This helps bind your topping; opt for **almond flour** for a gluten-free option.
- 3/4 cup packed light brown sugar: For that rich, caramel flavor! Use **coconut sugar** as a healthier choice.
- 1/2 teaspoon ground cinnamon: Yes, more cinnamon! It’s that good.
- 1/4 teaspoon salt: Enhances all the flavors.
- 1/2 cup (1 stick) unsalted butter, cold and cut into small pieces: This is key to achieving that crispy topping. If you’re dairy-free, use **vegan butter** or **coconut oil**.
Step-by-Step Instructions for the Perfect Apple Crisp
Now, let’s get down to the nitty-gritty of actually making this delicious treat! Follow these steps carefully for a perfect outcome.
Step 1: Preheat the Oven
Preheat your oven to **350°F (175°C)** and lightly grease a **9×9-inch baking dish**. This ensures your crisp comes out perfectly baked and easy to serve!
Step 2: Prepare the Apples
In a large bowl, toss the sliced apples with the granulated sugar, ground cinnamon, optional nutmeg, and lemon juice until everything is evenly coated. The apples should be juicy and fragrant!
Step 3: Make the Topping
In a separate bowl, combine the rolled oats, flour, brown sugar, cinnamon, and salt. Add the cold butter pieces and use your fingers or a pastry cutter to mix until the mixture resembles coarse crumbs. This is the magic that will make your topping crunchy!
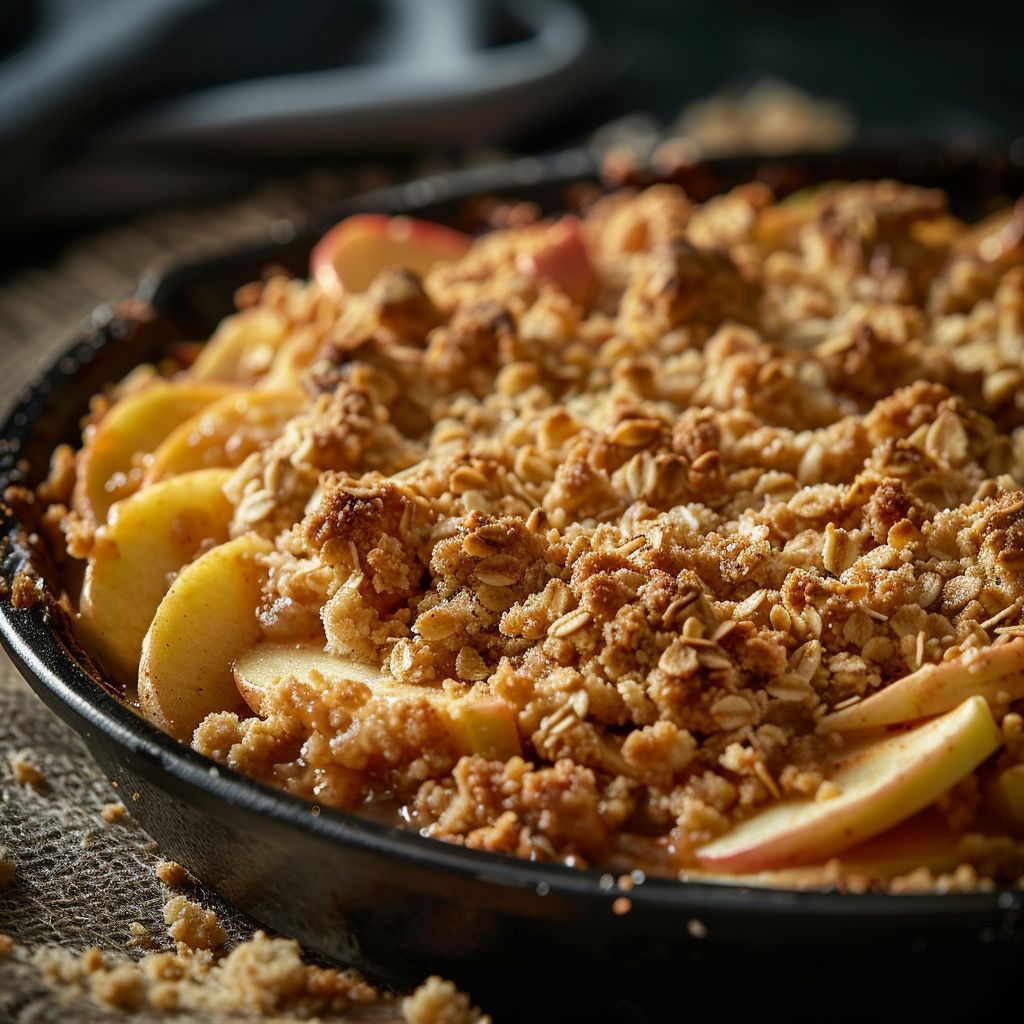
Step 4: Assemble and Bake
Spread the apple mixture into the prepared baking dish, and then scatter the oat topping evenly over the apples. Bake for **40–45 minutes**, until the apples are bubbling and the topping is golden brown and crisp.
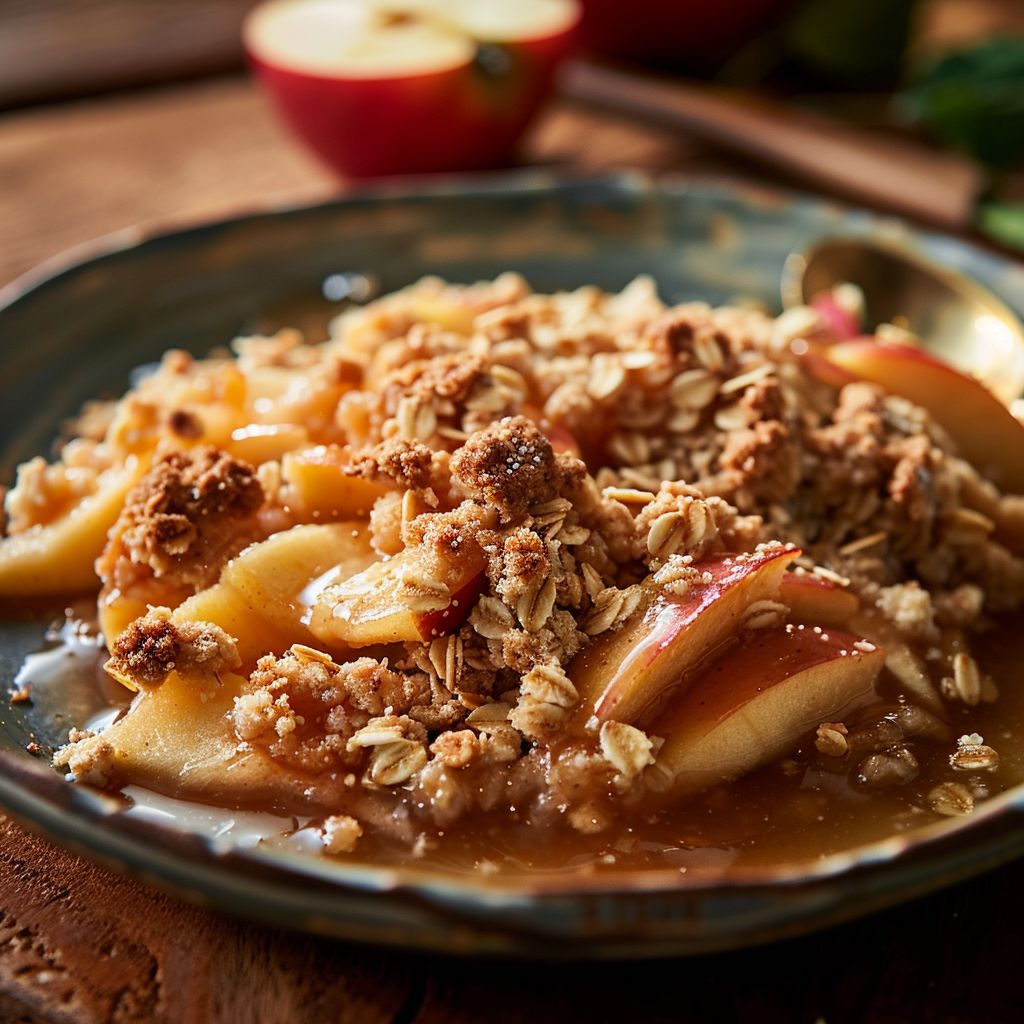
Step 5: Cool and Serve
Let the crisp cool for about 10 minutes to help the topping set. Serve it warm on its own or with a scoop of **vanilla ice cream** or a generous swirl of whipped cream for that extra indulgence!
Pro Tips for Apple Crisp Success
- Use a mix of apples: Combining sweet and tart varieties will give your crisp a more complex flavor profile!
- Don’t over-mix the topping: You want it crumbly and not uniform to achieve that perfect texture!
- Let it cool slightly: This helps the juices thicken, making it easier to serve.
- Experiment with spices: Try adding **ginger** or **allspice** for a unique twist on the classic flavor.
- Make it ahead: You can prep the apple filling and topping separately and store them in the fridge for up to 24 hours before baking.
- Use parchment paper: Lining your baking dish with parchment paper can help with cleanup and prevent sticking.
- Double the recipe: Feeding a crowd? Just double the ingredients and use a larger baking dish!
- Try adding nuts: Chopped walnuts or pecans can add an extra crunch to your topping.
Common Mistakes to Avoid
Even the best chefs make mistakes! Here are some common pitfalls to avoid when making your apple crisp:
- Using overripe apples: They can turn mushy during baking. Choose firm apples for the best texture.
- Not measuring ingredients accurately: Baking is a science! Measure your ingredients precisely for consistent results.
- Skipping the lemon juice: This is crucial for flavor and preventing browning, so don’t skip it!
Variations to Try
Feeling adventurous? Here are some fun variations to put a twist on your classic apple crisp:
- Berry Crisp: Mix in some fresh or frozen berries for a delightful twist on the original.
- Nutty Crisp: Add chopped nuts to the topping for extra crunch and flavor.
- Peach and Apple Crisp: Replace half the apples with sliced peaches for a juicy spin!
- Maple Pecan Crisp: Substitute maple syrup for sugar and add pecans to the topping for a delicious flavor.
Storage and Make-Ahead Instructions
This apple crisp is best enjoyed fresh but can be stored for later enjoyment!
Storage: Store leftover crisp in an airtight container in the refrigerator for up to 3-4 days. Reheat in the oven to crisp up the topping.
Make-Ahead: Prepare the apple filling and topping separately and store in the fridge for up to 24 hours before baking.
Frequently Asked Questions
- Can I make this apple crisp vegan? Yes! Substitute butter with **vegan butter** or **coconut oil**.
- What’s the best type of apple for crisp? Tart apples like **Granny Smith** or **Honeycrisp** work best for balance.
- Can I freeze apple crisp? Absolutely! Freeze before baking, then bake from frozen, adding a few extra minutes to the time.
- How do I know when my crisp is done? The topping should be golden brown, and the apples should be bubbling.
- Can I add nuts to the topping? Yes! Chopped walnuts or pecans add a delicious crunch.
- What if I don’t have rolled oats? You can use quick oats, but the texture may be slightly different.
- How can I make it gluten-free? Substitute all-purpose flour with **almond flour** and use **gluten-free oats**.
- Can I use frozen apples? Yes, just thaw and drain excess moisture before using.
Nutritional Tips and Dietary Adaptations
This apple crisp can be enjoyed while being mindful of your dietary choices!
- Lower Sugar Options: Use less sugar or substitute with natural sweeteners like **honey** or **maple syrup**.
- Gluten-Free Version: Make sure to use **gluten-free oats** and a suitable flour alternative.
- Healthy Fats: Use **coconut oil** instead of butter for a dairy-free and healthier fat option.
Equipment Recommendations
Having the right tools can make your apple crisp-making experience even smoother!
- Mixing Bowls: Get a set of mixing bowls in various sizes for all your mixing needs.
- 9×9 Baking Dish: This size is perfect for a classic apple crisp.
- Pastry Cutter: Makes mixing in butter a breeze!
- Measuring Cups and Spoons: Accurate measurements are crucial for baking success.
Serving Suggestions
Make your apple crisp extra special with these serving ideas:
- Top with Vanilla Ice Cream: The warm crisp and cold ice cream create a heavenly combination!
- Drizzle with Caramel Sauce: For those with a sweet tooth, a drizzle of caramel adds a decadent touch.
- Pair with Fresh Whipped Cream: Light and fluffy whipped cream contrasts beautifully with the warm crisp.
- Add a Sprinkle of Cinnamon: A light dusting of cinnamon adds a lovely finishing touch!
In conclusion, making an **Old-Fashioned Apple Crisp** is a delightful adventure filled with warmth, flavor, and joyous memories. With this recipe, you’ll not only impress your guests but also create a comforting dessert that brings smiles all around. So grab your ingredients and let the apple crisp magic unfold! Happy baking! 🍏✨

Old-Fashioned Apple Crisp
Ingredients
Method
- Preheat oven to 350°F (175°C). Grease a 9×9-inch baking dish.
- Toss sliced apples with sugar, cinnamon, nutmeg (if using), and lemon juice. Spread into dish.
- Mix oats, flour, brown sugar, cinnamon, salt, and cut-in butter until crumbly. Sprinkle over apples.
- Bake for 40–45 minutes until bubbling and golden. Cool slightly before serving.
Notes
Loved this recipe? Save it to your favorite Pinterest board so you can easily find it later! ✨